


In the majority of projects I have undertaken, release and regression have consistently posed challenges. By implementing Continuous Integration/Continuous Deployment (CI/CD), it is possible to minimize the risks of regression and other release-related errors.
To optimize the development process and ensure a seamless workflow, the incorporation of CI/CD practices is essential. In this article, we will delve into the integration of CI/CD into an Oracle APEX project using complimentary tools available in OCI. The Application Lifecycle Management technical paper, which was published earlier, serves as the basis for this article. The paper can be accessed here.
This article is the first installment in a series of blog posts. We will begin by discussing the requirements and setup, and in subsequent posts, we will examine the actual process of executing the scripts.
Understanding CI/CD
Continuous Integration (CI) and Continuous Deployment (CD) are DevOps practices that automate the software development lifecycle. CI involves regularly merging code changes into a shared repository, enabling early bug detection. CD extends this by automating the deployment process, ensuring a continuous flow from development to production. These practices enhance collaboration, reduce integration problems, and speed up delivery, allowing developers to consistently deliver high-quality software with efficiency and reliability.
Development approach
The technical paper distinguishes two development approaches: team-centric and feature-centric development.
"In a team-centric approach, colleagues work on assigned tasks directly in the shared APEX development environment. An issue "ticket" number like app-1234 identifies each work item. Periodically, the team's progress is exported to a Git work area, committed, and pushed to the permanent team repository. Most developers on the team don't need to directly interact with the file artifacts since another team member playing the role of a build manager adds their work to the Git repository. This approach works well for smaller teams. By design, each Git commit reflects the changes the whole team has made since the previous checkpoint. However, the more developers contributing to the team effort, the more challenging it becomes to review changes made for a particular feature or by a particular developer
With a feature-centric development approach, each colleague works on one bug or feature at a time in a private work area using a private APEX instance where they are the only developer making changes. They work as long as necessary to complete their task and testing. Before submitting their changes for peer review, they update their private area to merge in any approved changes colleagues have made to application artifacts in the meantime. This proactively ensures any conflicts with their own changes get resolved. When ready, they submit their changes for peer review."
This blog will demonstrate the team-centric approach. In a later blog I'll show the feature-centric approach.
Installing requirements
To run the example we need the following tools:
Github
Compute instance
Autonomous Database with APEX
Jenkins
Setup compute instance, Jenkins & Utils
I'll assume you've a Git repo and we'll start with setting up a compute instance in OCI. In the console navigate to compute > instances, here you can click on the "Create instance" button.
Give the instance a name, i.e. CI-CD VM
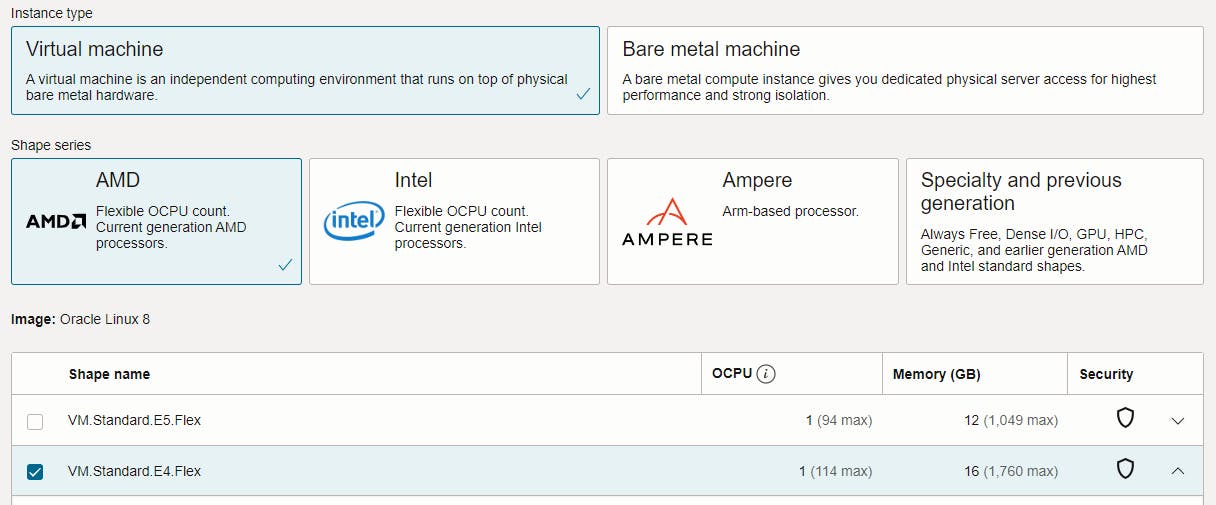
Select your image and shape
a. when using the free tier you only have one option: VM.Standard.E2.1.Micro. With 1 CPU and 1GB of memory this lacks resources to run smoothly in my opinion, but it's possible to use.
b. I recommend to use the (paid) AMD shape: VM.Standard.E4.Flex
Generate and download the SSH key pair
Create the instance
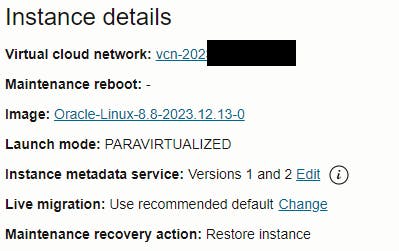
After the instance is created, we need to allow connection from anywhere. Click the VCN link in the Instance details
Navigate to security list by clicking security lists and then default security list for vcn-...
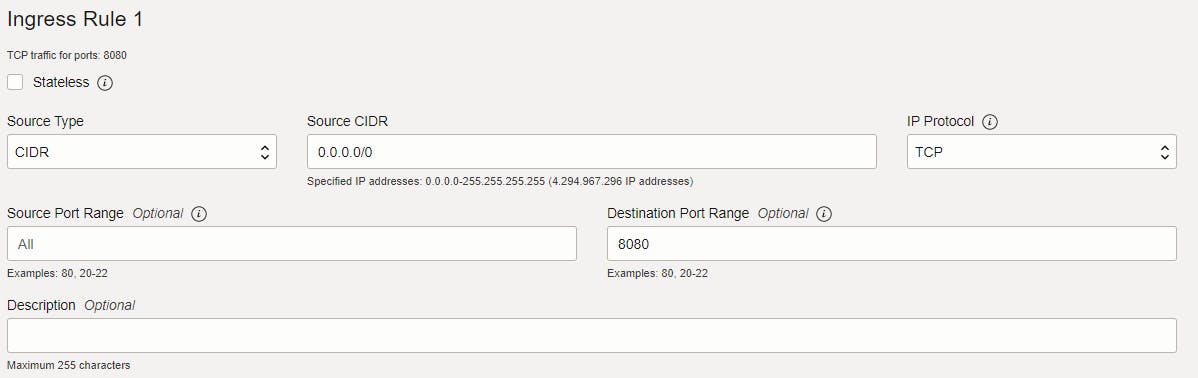
Add ingress rule with the following parameters. The 0.0.0.0/0 means the source can be any ip adress
Return to the instance. Here you'll see the following. Copy the IP adress.

Connecting to the instance can be achieved in diffent ways. I'll be using the VS Code extension Remote - SSH, but you can also use tools like Putty
The extension uses a config file saved on your local machine. Copy the IP adress to the hostname and add the path to the saved private key to the IdentityFile parameter. The host parameter can be used freely
Host CI-CD VM
  Hostname {IP-adress}
  User opc
  IdentityFile {path to SSH private key}
Connect to the instance
Install java
sudo yum install java-17-openjdkAdd jenkins repo
sudo wget -O /etc/yum.repos.d/jenkins.repo https://pkg.jenkins.io/redhat-stable/jenkins.repoAdd the Jenkins key (the 2024 isn't available yet)
sudo rpm --import https://pkg.jenkins.io/redhat-stable/jenkins.io-2023.keyInstall, enable and start Jenkins
sudo yum install jenkins
sudo systemctl enable jenkins
sudo systemctl start jenkins
Add firewall rule, so you can access the webportal from your local machine
YOURPORT=8080
PERM="--permanent"
SERV="$PERM --service=jenkins"

firewall-cmd $PERM --new-service=jenkins
firewall-cmd $SERV --set-short="Jenkins ports"
firewall-cmd $SERV --set-description="Jenkins port exceptions"
firewall-cmd $SERV --add-port=$YOURPORT/tcp
firewall-cmd $PERM --add-service=jenkins
firewall-cmd --zone=public --add-service=http --permanent
firewall-cmd --reload
Browse to http://{IP-adress}:8080. It can take a while before Jenkins is ready to be used (especially when using the free tier)
Get the adminpassword and paste this in the browser
sudo cat /var/lib/jenkins/secrets/initialAdminPasswordInstall the suggested plugins
Create the admin user by using the wizzard
Now you're ready to use the compute instance with jenkins. Now we can install the utillities needed to run the pipelines
- install Git
sudo yum install git -y
- install SQLcl
sudo yum install sqlcl -y
Set JAVA_HOME variable for SQLcl
export JAVA_HOME=$(readlink -f $(which java) | sed "s:bin/java::")
Create a Jenkins Agent
A Jenkins agent is a system that Jenkins can use to execute build jobs. This system can be the same machine as the Jenkins server or a different machine. The agent allows Jenkins to offload build projects from the master server, thus distributing the workload. This can be beneficial in large-scale projects where multiple builds are running concurrently, or in projects where builds require different environments or specific system configurations. To run a Jenkins agent, we first need to create one. Execute the commands below to create such an agent. A big thanks to Matthew Mulvaney from Pretius UK and his blog [1], where I got most of the commands
Disable the (default) built-in node
→ Dashboard > Manage Jenkins > Nodes > Build-In Node > Configure > Number of executors > set 0Create new Node
→ Dashboard > Manage Jenkins > Nodes > New NodeAdd Node Name (this example uses testNode) and select Permanent Agent
Set the remote root directory to
/home/opc/testNodeSelect Use Websocket
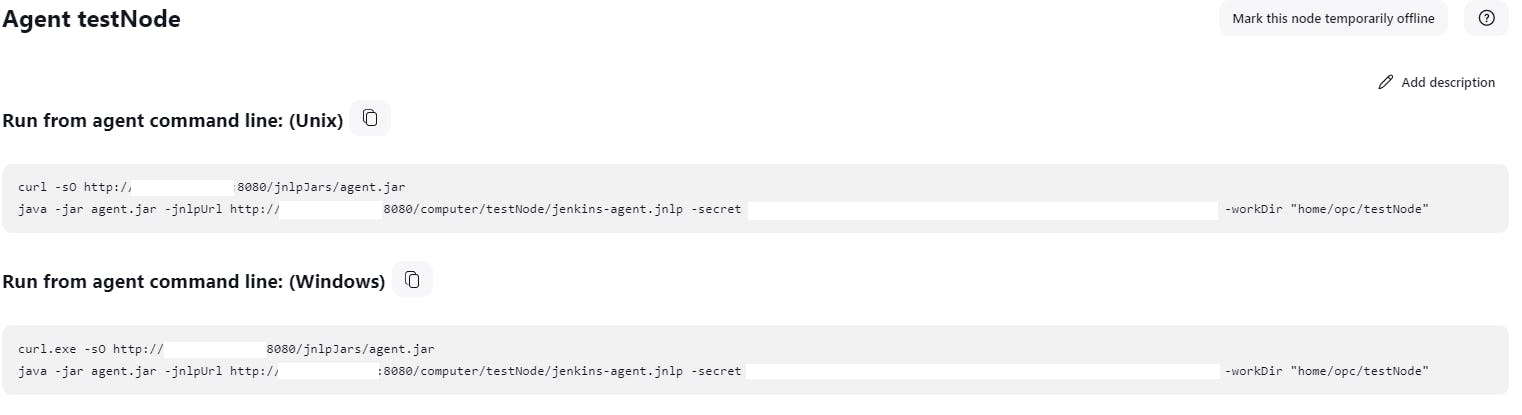
Save and open the testNode. Here you'll find different commands we need in the next steps
Open the terminal and create a directory
 mkdir /home/opc/testNode
 cd /home/opc
Run the first command form the Unix commands
To auto-load on reboot create a new file like this
sudo nano /etc/systemd/system/jenkins-ci-cd-node.servicePaste in the following. Don't forget to import the second command from the Unix commands
[Unit]
Description=Jenkins CICD Node agent
After=syslog.target

[Service]
Type=simple
User=opc
ExecStart=/usr/bin/java -jar /home/opc/agent.jar -jnlpUrl [PASTE IN FROM LINE TWO STARTING WITH http:// AND ENDING WITH THE END OF THE CODE BOX]
Restart=always
RestartSec=30

[Install]
WantedBy=multi-user.target
Enable, start and check the service
sudo systemctl enable jenkins-cicd-node.service
sudo systemctl start jenkins-cicd-node.service
sudo systemctl status jenkins-cicd-node.service
Refresh and check if the agent is connected
Create Autonomous Database with APEX
In the OCI console, navigate to Oracle Database > Autonomous Database > Create Autonomous Database. Here, we'll create a new database.
Change the display name and database name to be more descriptive. This will help later on.
Select Transaction Processing or APEX as the workload type. I prefer the transaction type.
Set the admin credentials.
Create the database.
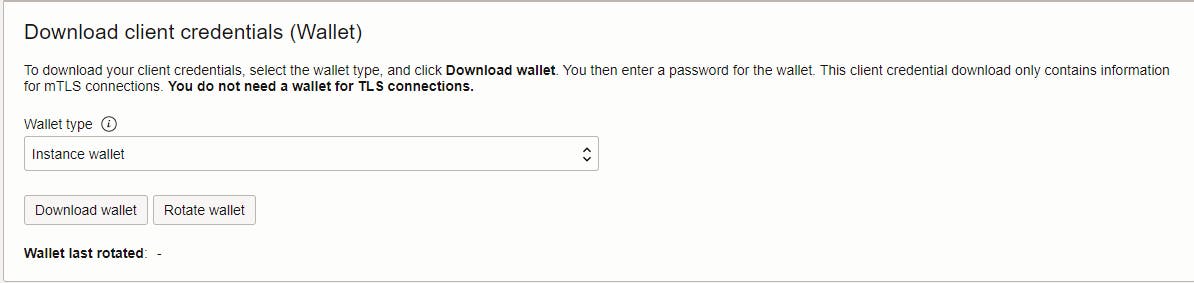
When the database is available, download the database client credentials. We need the zip to connect from the compute instance.
We now have installed all the requirements to start building an application and pipeline.
Part II of this blog series will dive into how to manage/organize your application code.
Part III will delve into creating the pipeline to test and install your application into another environment.